Making candles directly in glass jars is an excellent way to simplify the process and create stunning, ready-to-use candles. This method eliminates the need for pouring melted wax into separate containers, saving time and reducing mess. If you’re new to candle making, melting wax in a glass jar is a fantastic way to get started.
In this guide, we’ll explore the tools, techniques, and safety precautions for successfully melting candle wax in a glass jar.

Why Use a Glass Jar for Candle Making?
Glass jars are one of the most popular containers for candles because they are:
- Heat-resistant: They can withstand high temperatures during the melting and burning process.
- Aesthetic: Glass jars come in various shapes and sizes, perfect for customizing your candles.
- Eco-friendly: Reusable and recyclable, they are a sustainable option for candle making.
- Convenient: They double as melting containers and candle holders, reducing cleanup.
The step-by-step process of melting candle wax in a glass jar
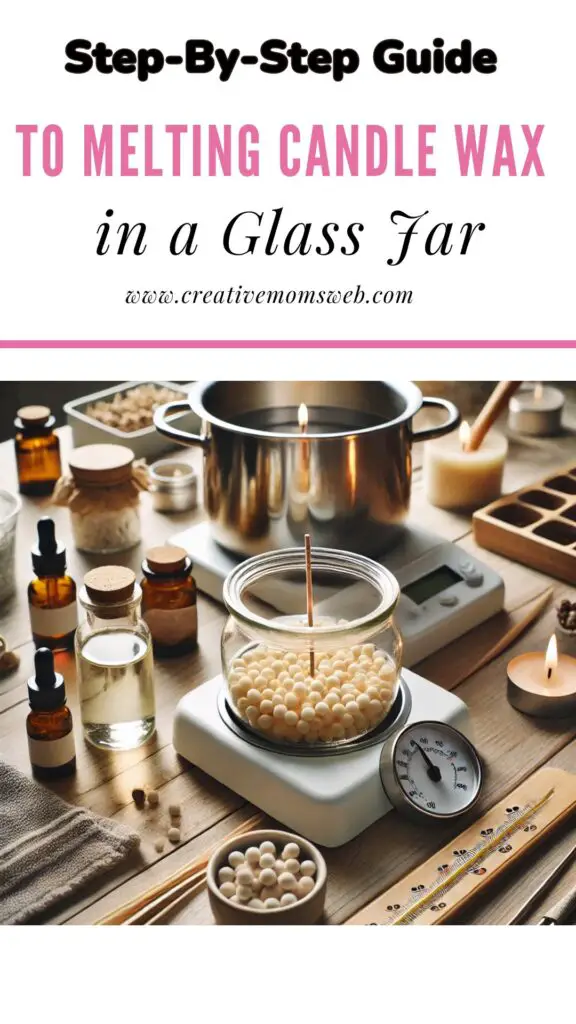
What You’ll Need
Before you begin, gather the following materials:
- Glass jar: Choose a heat-resistant glass jar designed for candle making. Mason jars or specialized candle jars work well.
- Candle wax: Soy, paraffin, or beeswax are great options.
- Wick: Pre-tabbed wicks are easy to work with. Ensure the wick is appropriate for the size of your jar.
- Thermometer: To monitor the wax temperature.
- Wick holder: Helps keep the wick centered while the wax melts.
- Microwave or double boiler: For melting the wax (if not using direct heat in the jar).
- Optional additives: Fragrance oils, essential oils, or dyes for customization.
Step 1: Selecting the Right Glass Jar

When melting candle wax in a glass jar, it’s crucial to choose a jar that is heat-resistant and suitable for the task. Look for a jar made of thick, durable glass that can withstand the heat of the melted wax. Mason jars or other heat-resistant containers designed for candle-making are ideal options.
One of the best heat-resistant glass jar is AOZITA glass jar
Step 2: Preparing the Candle Wax
Before melting the wax, prepare it for the process. Start by chopping the candle wax into smaller pieces using a clean knife. Smaller chunks melt more evenly and quickly. Remove any wicks or metal components from the wax to prevent them from interfering with the melting process.
Step 3: Melt the Wax
You have two options for melting the wax:
Option 1: Microwave Method
- Place the measured wax in a microwave-safe container.
- Heat in 1-minute intervals at medium power, stirring after each interval until fully melted.
- Pour the melted wax into the prepared glass jar.
Option 2: Direct Heat in the Jar
- Place the jar in a double boiler setup.
- Slowly heat the jar, stirring the wax as it melts.
- Avoid direct heat sources like stovetops or open flames, as they can cause the jar to crack.
Double Boiler Method
To ensure the safe and controlled melting of candle wax in a glass jar, using a double boiler setup is recommended. Here’s how to do it:
- Fill a pot with water about a third of the way and bring it to a simmer on the stove.
- Place the glass jar with the wax pieces inside the pot, ensuring that the water level is below the rim of the jar.
- The indirect heat from the simmering water will gently melt the wax inside the jar.
- Stir the wax occasionally using a heat-resistant spoon or popsicle stick to promote even melting.
Step 4: Monitoring the Wax Temperature
During the melting process, it’s essential to monitor the wax temperature to prevent overheating. Use a candy or candle-making thermometer to check the wax’s temperature periodically. Aim to keep the temperature around 160–180°F (71–82°C) to ensure smooth consistency.
Step 5: Adding Fragrance or Color (Optional)
If desired, you can enhance your melted wax with fragrance oils or colorants. Once the wax is fully melted, add a few drops of your chosen fragrance oil or colorant and stir gently to distribute evenly. Be mindful not to overload the wax with excessive amounts, as this may affect the candle’s performance.
Step 6: Pouring the Melted Wax
Once the wax has reached the desired consistency and any additional elements are mixed in, carefully pour the melted wax into your chosen candle molds or containers. Ensure that the glass jar is clean and free from any residue before pouring.
Step 7: Cooling and Solidifying
Allow the poured wax to cool and solidify completely. This process typically takes a few hours, depending on the size and thickness of the candles. Avoid disturbing or moving the jars while the wax is set to ensure a smooth and even surface.

Tips for Success
- Choose quality jars: Ensure the glass jar is heat-resistant and designed for candle making to avoid cracking or breaking.
- Monitor temperatures: Overheating wax can affect fragrance throw and create safety hazards.
- Handle with care: Use oven mitts or heat-resistant gloves when handling hot jars.
- Experiment with designs: Add layers, colors, or decorative elements like dried flowers for unique candles.
Safety Precautions
- Never leave wax unattended: Wax can overheat quickly and become a fire hazard.
- Avoid overfilling: Leave some space at the top of the jar to prevent wax spills when the candle burns.
- Work in a ventilated area: Especially when using fragrance oils, ensure good airflow.
Melting candle wax in a glass jar provides an enjoyable and convenient method for creating personalized candles. By following the steps outlined above, you can safely melt wax in a glass jar and transform it into beautiful candles that add warmth and ambiance to any space. Remember to exercise caution, monitor the wax temperature, and let your creativity soar as you embark on your candle-making journey.
Shop My Favorite Essentials for Candle Making: A Complete Guide for Stay-at-Home Moms
Candle making is a fantastic hobby that allows stay-at-home moms to tap into their creativity, relax, and even start a small business. Whether you’re a beginner or looking to refine your skills, having the right tools and materials is essential. Here’s a list of must-have candle making supplies available on Amazon to get you started. Each item includes a specific product example to make your shopping easier.
1. Wax
Wax is the foundation of any candle. Different types of waxes like soy, beeswax, and paraffin have their unique benefits.
Recommended Product:
- NatureWax C-3 Soy Wax
NatureWax C-3 Soy Wax on Amazon
This all-natural soy wax is perfect for beginners. It provides a smooth finish and excellent scent throw, ideal for container candles.
- Paraffin wax
Blended Waxes, Inc. offers a versatile paraffin wax suitable for various candle-making projects. This wax is fully refined and designed for creating both container and pillar candles, making it a versatile option for different types of candles.
- Palm wa
This palm wax can be used to make many types of candles, including pillars, votives, tapers, and tealights. It can be heated to 180 °F (82 °C). You may choose any fragrance for your candle or leave it unscented.
- Coconut wax
The True Coconut Premium All-Natural Coconut Wax Blend is a game-changer for DIY candle makers seeking a luxurious and eco-friendly option. This wax burns exceptionally clean, delivering an impressive fragrance throw that fills the room without any unpleasant residue. Its soft texture ensures excellent adhesion to glass jars, making it easy to create professional-looking candles.
2. Wicks
Choosing the right wick is crucial for an even burn. Cotton wicks are the most popular, but wood wicks can add a unique crackling sound.
Recommended Product:
- EricX Light 100 Piece Cotton Candle Wicks
EricX Light Candle Wicks on Amazon
These eco-friendly cotton wicks are pre-waxed and come in various sizes, making them perfect for different candle types.
3. Fragrance Oils
To add delightful scents to your candles, fragrance oils are a must. Make sure they are specifically formulated for candle making.
Recommended Product:
- P&J Trading Fragrance Oil Set
P&J Trading Fragrance Oil Set
This set includes a variety of scents like lavender, vanilla, and sandalwood. The oils are highly concentrated, ensuring a long-lasting fragrance.
4. Dye for Candle Coloring
If you want to add color to your candles, go for candle-specific dyes that won’t clog your wick.
Recommended Product:
- Candle Shop Candle Dye Flakes
Candle Dye Flakes
These dye flakes come in a variety of colors and are easy to use. Just a small amount can give you vibrant colors without affecting the candle’s performance.
5. Candle Molds
For creative shapes beyond standard jars, silicone molds are a versatile option.
Recommended Product:
- Cozyours Silicone Candle Molds
Cozyours Silicone Molds
These reusable molds come in various shapes like hearts and stars, perfect for making unique candles.
6. Candle Pouring Pot
A pouring pot is essential for safely melting and pouring your wax. It allows for easy control to prevent spills.
Recommended Product:
- CandleScience Aluminum Pouring Pot
CandleScience Pouring Pot
With a 2-pound capacity, this pouring pot is lightweight, durable, and perfect for handling hot wax.
7. Thermometer
Temperature is key in candle making. A thermometer ensures your wax is at the optimal temperature for adding fragrance and pouring.
Recommended Product:
- KT THERMO Deep Fry Thermometer with Clip
KT THERMO Deep Fry Thermometer
This stainless steel thermometer comes with a clip, making it easy to attach to your melting pot. It provides accurate readings between 50°F and 550°F, perfect for monitoring wax temperature. The large dial display ensures you can easily read the temperature, and the clip keeps it secure during the melting process.
Key Features:
- Temperature Range: 50°F to 550°F (10°C to 290°C)
- Clip Attachment: Securely clips onto the side of your pot for hands-free monitoring
- Large, Easy-to-Read Dial: Clear display for quick temperature checks
- Durable Stainless Steel Construction: Built to last and easy to clean
This thermometer is versatile and can also be used for cooking, making it a handy tool to have in your kitchen.
8. Heat Gun
A heat gun helps smooth out the tops of candles and fix imperfections like sinkholes.
Recommended Product:
- Chandler Tool Heat Gun
Chandler Tool Heat Gun
This compact heat gun is perfect for candle makers. It features two heat settings and a built-in stand.
9. Candle Labels
For a professional finish, especially if you’re selling your candles, consider using pre-made labels or printable sticker sheets.
Recommended Product:
- Avery Printable Round Labels
Avery Round Labels
These glossy labels are easy to customize and print, giving your candles a professional touch.
10. Candle Containers
Containers like tins, jars, and votives are essential for making container candles.
Recommended Product:
- Accguan 12 Pack Glass Candle Jars with Bamboo Lids
Accguan Glass Candle Jars
These elegant glass jars come with airtight bamboo lids, perfect for preserving the scent of your candles. They have a modern and minimalist design, making them ideal for creating gifts or selling candles. Each jar holds about 7 oz, which is perfect for medium-sized candles.
Key Features:
- Quantity: 12 jars per pack
- Capacity: 7 oz per jar
- Material: High-quality, heat-resistant glass with bamboo lids
- Design: Clear glass for a sleek look, ideal for showcasing candle colors
- Versatile Use: Great for candle making, storage, or home decor
- YIHANG 24 Pack Candle Tins
YIHANG Candle Tins
These tins come with lids and are perfect for travel candles or gift sets. They are durable and reusable.
11. Wick Centering Device
To ensure your wick stays perfectly centered as your candle sets, a centering device is a handy tool.
Recommended Product:
- DINGPAI Adjustable Candle Wick Holders (12-Pack)
DINGPAI Adjustable Wick Holders
These adjustable wick holders are designed to fit various container sizes, making them a versatile choice for candle making. Made from durable stainless steel, they can be adjusted to perfectly center your wick in jars, tins, and other containers. The adjustable arms allow you to secure multiple wick types, whether you’re using cotton or wooden wicks.
Key Features:
- Quantity: 12 holders per pack
- Material: High-quality stainless steel, built to last
- Adjustable Design: Expandable arms to fit containers from 2 inches to 4 inches wide
- Versatility: Suitable for single or double wicks, as well as wood wicks
- Ease of Use: Keeps wicks perfectly centered for an even burn
12. Safety Equipment
Safety should always come first. Protect yourself with gloves, aprons, and safety glasses when working with hot wax.
Recommended Product:
- NoCry Cut Resistant Gloves
NoCry Gloves
These gloves are heat-resistant and protect your hands from hot wax spills and burns.
